
Collection: Polaris General Windshield & Wiper Acccessories
Explore Polaris General windshield accessories for tip-out operation, rear-window projects, and washer spray delivery. Shop dash mounts, 3rd Row Inserts, the BYOW rear window frame kit, a rear lower steel filler panel, and the Wet Wiper Nozzle Kit. Find the upgrade for your setup and check product compatibility before ordering.

-
OG Tip-Out 3rd Row Inserts
Regular price $59.99 USDRegular price -
Polaris General Rear Lower Steel Filler Panel
Regular price $265.00 USDRegular price$0.00 USDSale price $265.00 USD -
Tip-Out Windshield Locking Dash Mount for Polaris General
Regular price $180.00 USDRegular price -
Polaris General BYOW Rear Sliding Window Frame Kit
Regular price $495.00 USDRegular price$495.00 USDSale price $495.00 USD -
OG QuickSnap Tip-Out Windshield Dash Mount for Polaris General
Regular price $79.99 USDRegular price -
OG Wet Wiper Nozzle Kit for Polaris General
Regular price $59.99 USDRegular price







Polaris General Windshield Accessories That Solve Everyday Frustrations
A windshield setup is something you use all day, often without thinking about it. Then a dash mount wears out, the vent position feels wrong, or your washer spray misses the area you want to clean. Suddenly, that small detail gets your full attention.
That’s where this collection comes in. Our windshield and wiper accessories focus on specific jobs around your General’s front and rear glass. You can compare tip-out hardware, explore a rear sliding window project, or improve an existing washer arrangement without sorting through unrelated gear.
Start with one question: what do you want to work better? The answer helps narrow your options and keeps your next purchase connected to a real need. Below, you’ll find the differences between the six products and what to check before adding them to your build.

Get Your Polaris General Tip-Out Windshield Parts Sorted
Your tip-out handle, dash mount, and venting positions work together. When you compare Polaris General tip out windshield parts, first identify which part of that arrangement needs attention. Changing the handle’s available position and replacing its dash-mounted base are different jobs.

OG Tip-Out 3rd Row Inserts: Another Venting Option
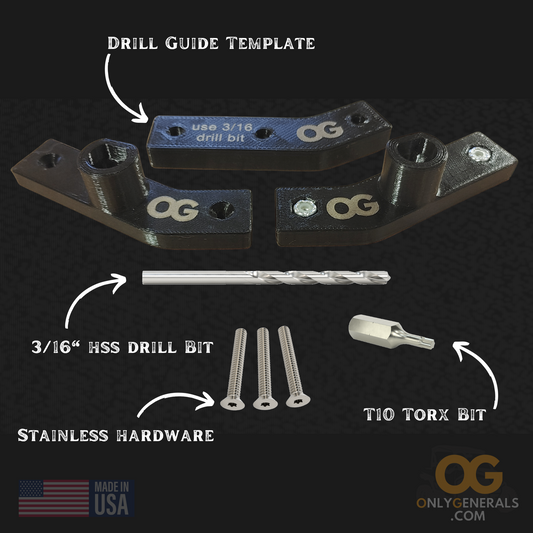
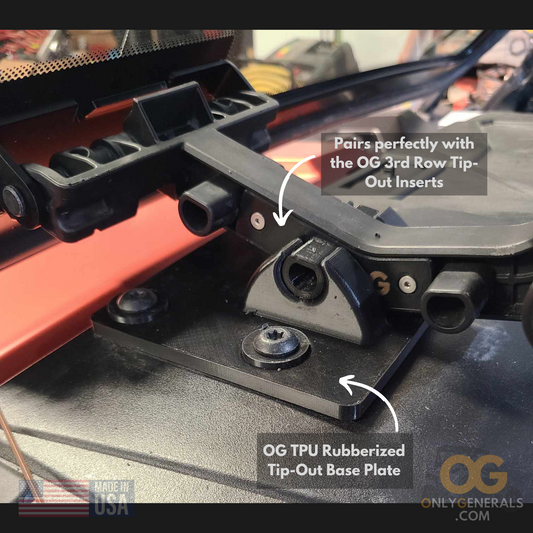
Wish you had another setting between the positions you already use? The OG Tip-Out 3rd Row Inserts add another lug position to your existing OEM T-handle. The design gives you an additional venting choice while retaining that handle.
The kit includes a drill guide and installation tools. Review the instructions before starting so you understand how the inserts attach. This is a handle upgrade, so compare it with your current tip-out system rather than shopping by model name alone.
For owners looking into a Polaris General third row windshield upgrade, “third row” refers here to the added handle position. It does not mean an additional windshield or a third row of seating.

QuickSnap: A Serviceable Dash Mount
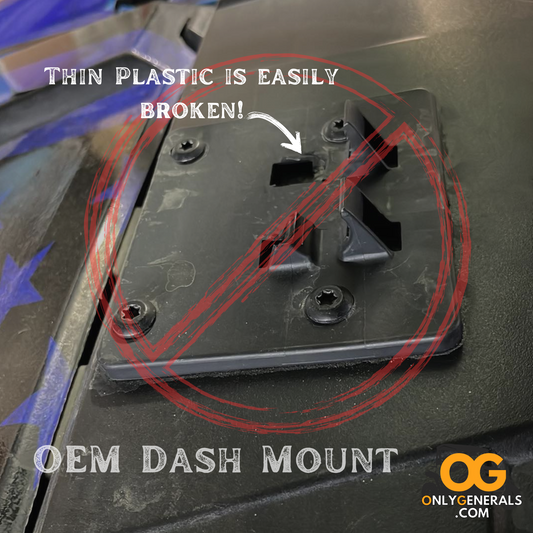
A worn mounting base deserves attention before your next outing. The OG QuickSnap Tip-Out Windshield Dash Mount uses a rigid base and replaceable TPU riser inserts to hold the Polaris T-handle. It reuses the existing factory mounting hardware and under-dash backing plate.
If you’re comparing a Polaris General windshield dash mount, this option is worth reviewing when replaceable inserts appeal to you. The product listing explains its construction and compatibility with the existing Polaris Tip-Out windshield.
Look at the base currently installed on your dash and compare its role with the QuickSnap. Confirming the windshield system is part of choosing the right mount, even when the vehicle itself is a General.

Locking Dash Mount: A Different Retention Design
The Tip-Out Windshield Locking Dash Mount offers a machined aluminum design with spring-loaded stainless steel pins that retain the T-handle. Finger loops operate the pins, with an option to hold them open while moving the handle.
QuickSnap and the locking mount are alternatives for the dash-base position. Compare their operating methods and choose the approach you prefer; you don’t need both installed for the same job.
When selecting Polaris General windshield hardware, think about how you’ll operate it throughout the day. Review the product photos and instructions, then choose the mount that suits your existing system and your preferences.

Plan Your Polaris General Rear Window Setup
The rear of your cab deserves the same attention as the front. This collection includes two different ways to approach that area: a frame kit for a sliding-window project and a lower filler panel for a compatible existing rear glass arrangement.

BYOW Rear Sliding Window Frame Kit
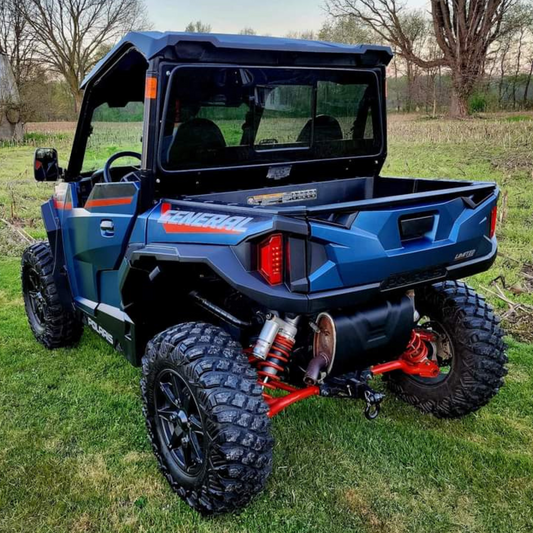
Want to build a sliding-window setup? The BYOW Rear Sliding Window Frame Kit supplies a steel mounting frame with an integrated lower filler panel. You supply the specified 1998–2011 Ford Ranger rear sliding window separately.
That’s the “Bring Your Own Window” part. The sliding window is not included in the frame kit, so account for sourcing it when planning your project. Read the listing and installation instructions before ordering the separate window.
If you’re researching a Polaris General rear sliding window, the BYOW product page is the place to examine the frame, mounting arrangement, and kit contents. Plan the whole assembly before you begin, including the window itself and the space needed to carry out the installation.

Rear Lower Steel Filler Panel
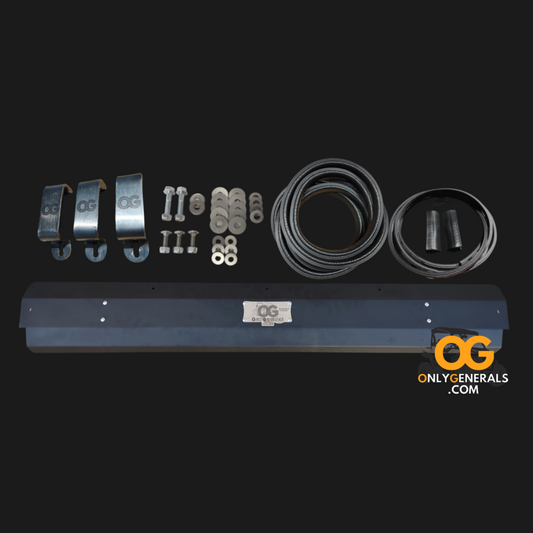
Already using a Polaris Lock & Ride rear glass window and unhappy with the plastic panel beneath it? The Rear Lower Steel Filler Panel provides a steel replacement for that lower section, with weather seals and mounting hardware.
This is a filler panel, not a replacement rear window. It addresses the area below compatible rear glass and gives owners another way to finish that part of the cab.
Choose between these rear-cab approaches based on your window plans. The BYOW frame already includes its own lower filler panel, so don’t assume you need to add this separate panel to that kit. Check the assembly you’re building and purchase the components it actually requires.

Put Washer Spray Where You Need It
Your Polaris General windshield wiper and washer delivery work together. If the washer nozzle is the part you want to change, take a closer look at the OG Wet Wiper Nozzle Kit.
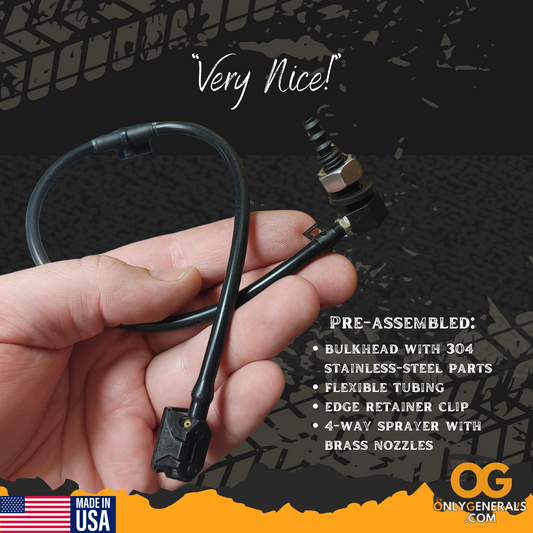
The nozzle mounts on the wiper arm and moves with it, delivering fluid through adjustable sprayers. The kit includes tubing and fittings for connecting to the washer supply, and the product page describes compatibility with the OEM wiper and washer setup.
This is a Polaris General windshield washer nozzle upgrade. It does not supply a complete wiper motor, arm, and washer system. If you’re searching for a Polaris General windshield wiper kit, first establish whether you need an entire system or an improvement to one already installed.
Review the routing and installation instructions before ordering. Knowing your current equipment helps you decide whether this is the next useful step for your machine.